
Here is a check list for the additional supplies you will need
□ Stud finder
□ Utility knife
□ Drywall saw
□ Philips head screw driver
□ Painters tape
□ Level
□ Chalk line if more than two are being installed on the same wall.
For drywall seamless finish:
□ 4 feet of drywall tape
□ Drywall mud as needed
□ Fine grit sanding paper
□ Primer
□ Top coat paint
□ Small roller and/or brush
For framed inset niche:
□ 1 frame with 10 inch X 10 inch inside dimension or molding
□ (Suitable frames can be purchased through http://www.modernniche.com )
□ Primer paint, small roller and/or brush
□ Top coat paint, small roller and/or brush
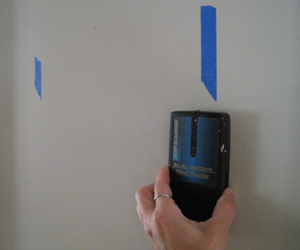
Step 1 – Use a stud finder to locate all the studs that fall within the desired area. Mark each stud location.
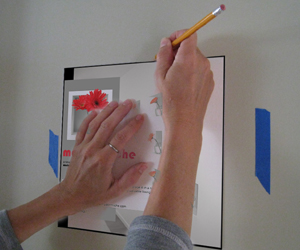
Step 2 – Place the template in the desired location. Then trace around the template to create your cut lines. Make certain the cut lines are level and that they do not overlap your studs.
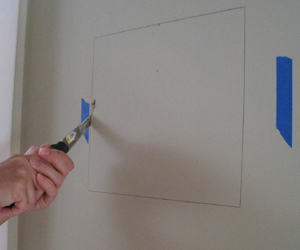
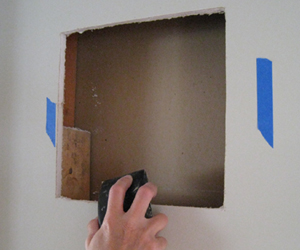
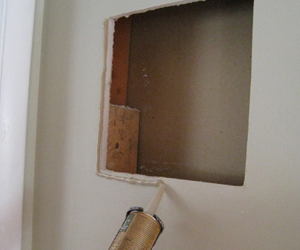
Step 3 – Determine that there are no plumbing or electric lines in the desired niche location. Using your utility knife or drywall saw, carefully cut each opening. If needed, sand front surface around opening until flat.
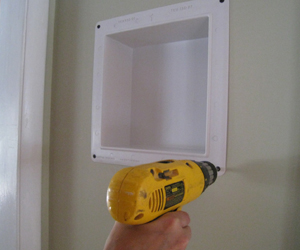
Step 4 – Apply constuction adhesive around the opening and place niche inside, using drywall screws to hold niche in place.
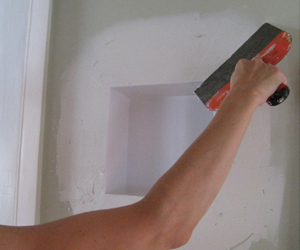
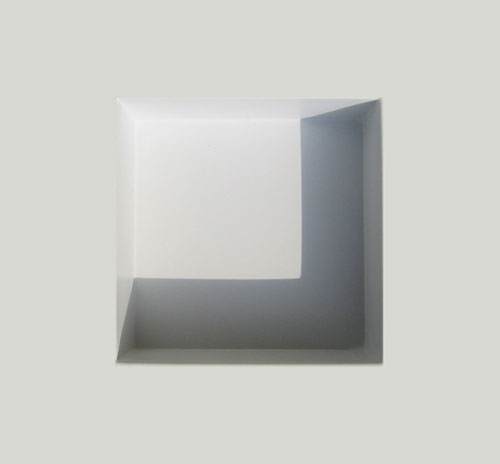
Step 5 Drywall Finish – The niche can be finished using traditional dry wall methods. The molded bead around the front of the box is there to guide your drywall knife and create a smooth edge. After drywall mud is dry and smooth, finish wall and niche with primer and paint. As shown in the image, below left
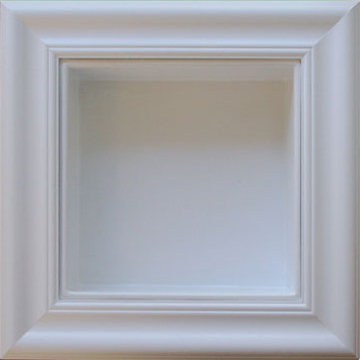
Step 5 Molding Finish –
If drywall mud is not preferred, molding can be used to trim and cover the flanges. As shown in image, below. To finish, prime and paint molding and niche.
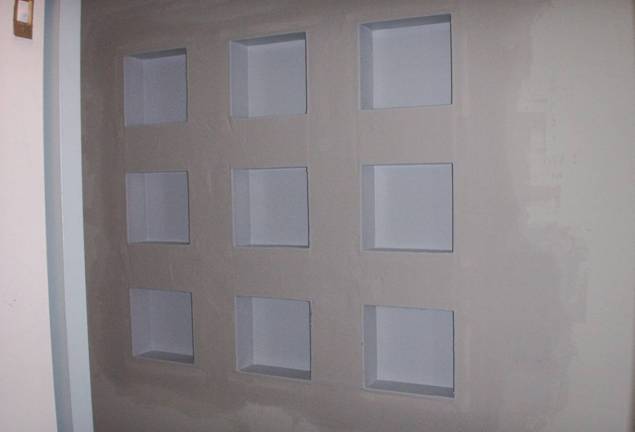
Example of a 3 by 3 array of niches in the final stages of finishing.